
LED Star Board Connector Adapter
For those of you who have worked with LED star boards, you’re probably very familiar with things that look like this.

No matter how careful and clean you are, it’s time consuming and super messy. This isn’t even as bad as it could be, for that setup four of the pads are connected together!
For this post, I’m going to show you how to turn that wire ratsnest into this beautiful connectorized board.

The basic story here is simple. Anyone who has used a lot of LED star boards has had to do a ridiculous amount of hand soldering in order to make it work. This takes forever, and introduces a high probability of an error like a solder bridge. Plus, once it’s assembled you can’t take it apart if you want to change something.
So instead, we printed a special adapter PCB that solders directly onto a 4-channel 10W LEDEngin star board and provides two connectors with spring contacts for easy connection and disassembly.
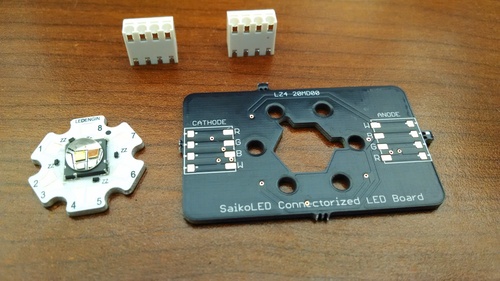
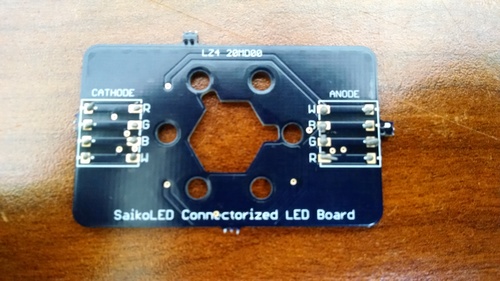
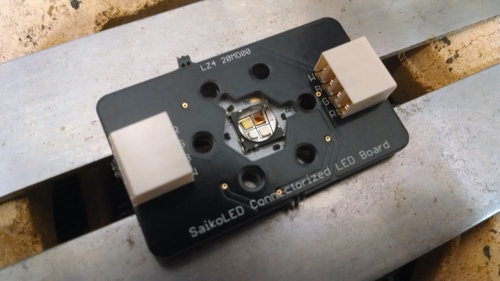
This is what the front looks like. The two leadless connectors shown go there on the top of the board – four wires for the cathodes and four for the anodes.
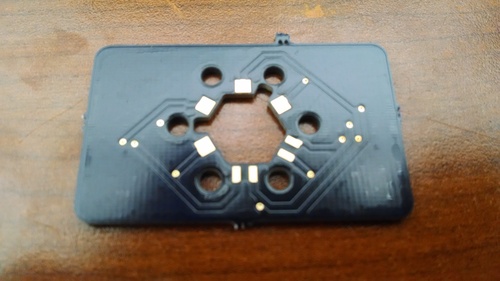
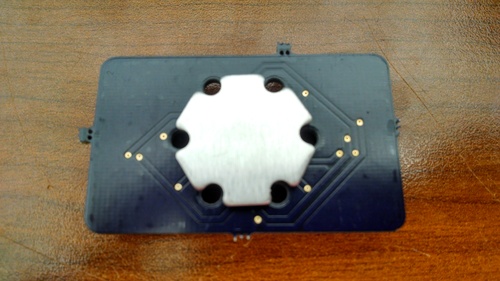
and this is what the back of the board looks like. Those pads and the six screw holes perfectly align with the LZ4-20MD00, a RGBW LED from LEDEngin. For other LED star boards, changes to the adapter are of course needed.
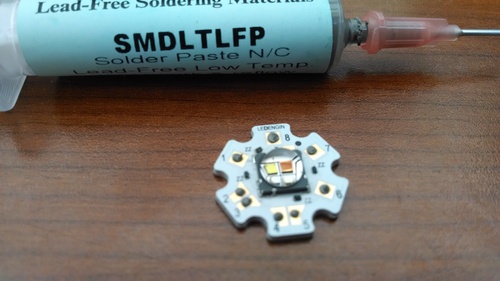
and here you can see how the pads on the LZ4-20MD00 are laid out. I put down some low-melting point RoHS solder paste (silver-bismuth). The idea here is that the pads will reflow before the LED gets loose, giving me a visual cue as to the temperature the board has reached later.
Similarly, I put dabs of solder paste on the top of the board
and place the two spring loaded push connectors in approximately the correct locations.

Next, I put the LED star board over my hot plate so that the copper or aluminum heat sink part is exposed to heat. The idea here is that because the board is such a good conductor, it is easy to bring the solder on the pads up to the correct temperature by reverse-heating through the heat sink.

and we put the connector board on top of this, aligned so that the holes and pads match
From here, you turn on the hot plate until you see the LED solder begin to reflow, or else monitor the connector board connectors. Those should be the last to reflow given the heat path, so those will be a good signal for when the board is all cooked.
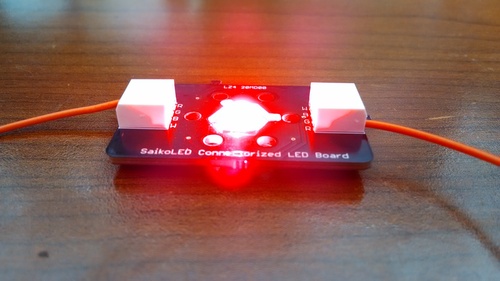
The final board looks like this.

so you have all the heat sinking advantages of attaching this star board directly to a heat sink, with all the benefits of having easy to maintain and disassemble connectors on the top!
For this particular connector, you simply push the wire into the connector to make contact, and put a small screwdriver in the slot at the top to release. Extremely quick, easy, and robust (7A connector!).
Here it is showing each of the channels, now much simpler to swap between. Sorry about the saturation, I had to come in from very shallow angles to get the CCD on my phone to not go crazy. This is a 10W LED overall, so we’re moving into the “hey, this is a pretty powerful light” territory. Note for scale, board is about 1" x 1.75".


that last one is a little wild, I don’t know where that crazy pattern is coming from. The same thing happened with the RGB channels until I tilted it really far… maybe it’s a sign.
Anyway, I hope you enjoyed that. I think this is a great and quick way to convert ubiquitous star boards which are great thermally, but horrible from a systems point of view due to the cost of manually integrating them into a system. With this, you should be able to quickly manufacture a device in much more modular ways, and improve both reliability and assembly speed.
This can also be used with things like the 40W LZC series of RGBW LED, or other multi-channel star boards like the three channel Rebel Luxeon Star boards or even the 7 channel Rebel Luxeon Star boards. It’s a very compelling option anytime you have off-the-shelf nice thermal design LED boards with solder pads instead of real connectors.